- QTC INFOTECH")
How to Add Products in WooCommerce: A Step-by-Step Guide
Step 1: Log in to Your WordPress Dashboard
Step 2: Add Product Title and Description
Step 3. Add a Product Image (Main Featured Image)
Step 4: Choose Product Type
Step 5. Set Product Categories and Tags
Step 6: Add Short Description (For Quick View)
Step 7: Publish Your Product
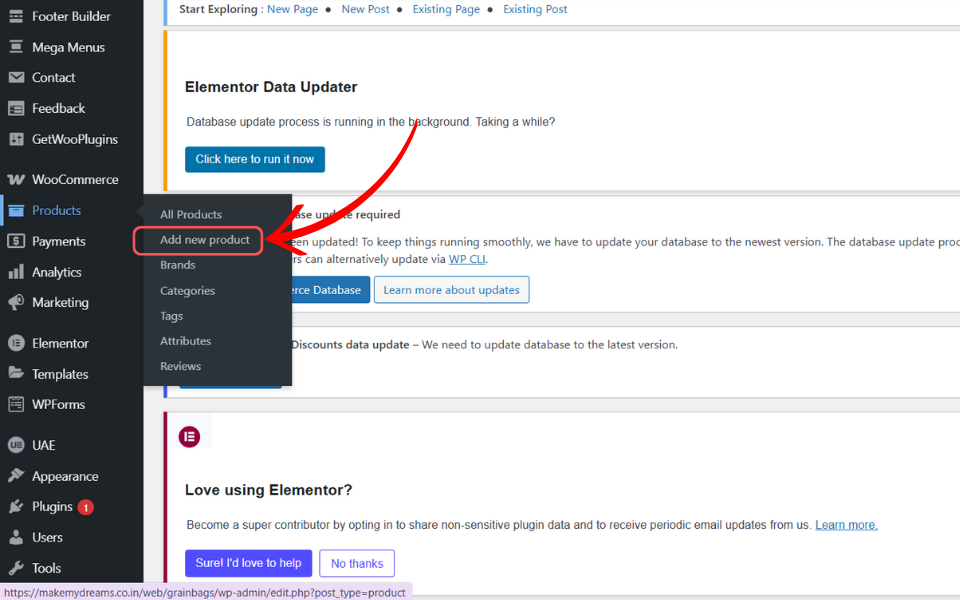
Step 1: Log in to Your WordPress Dashboard
- Open your website and log in to your WordPress Admin Panel.
- Navigate to WooCommerce > Products from the left sidebar.
- Click “Add New” to start creating a new product.
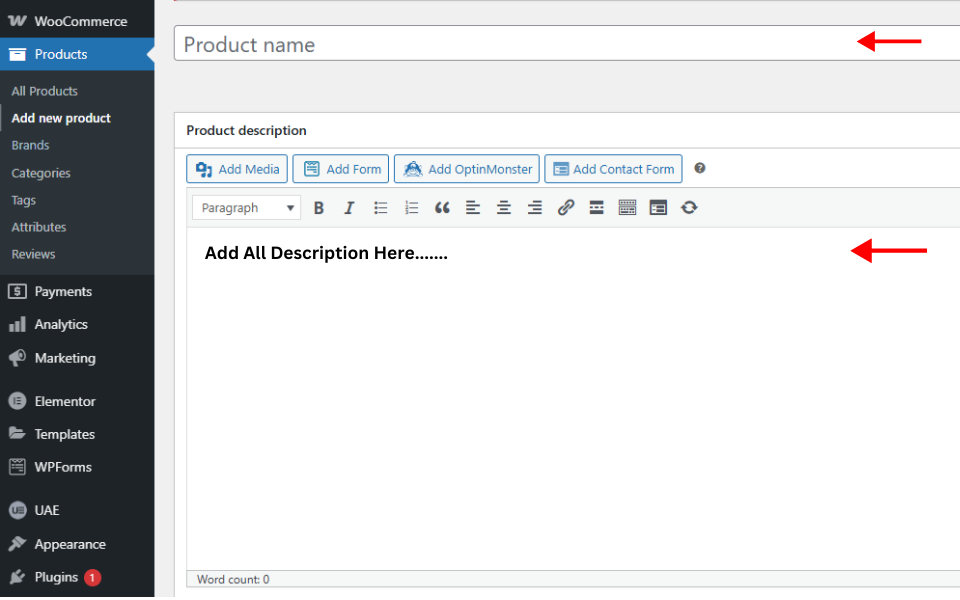
Step 2: Add Product Title and Description
Add Product Title and Description.
- Enter the Product Name in the title field.
- In the description box, add detailed information about the product, including its features, benefits, and specifications.
- Use bullet points for better readability.
Step 3. Add a Product Image (Main Featured Image)
The Product Image is the main image that appears on product pages and category listings.
- Scroll down to the “Product Image” section on the right-hand side.
- Click “Set Product Image”.
- Upload a new image or select an existing one from the Media Library.
- Click “Set Product Image” to save.
✅ Tip: Use high-quality images (at least 800×800 pixels) with a white background for a professional look.
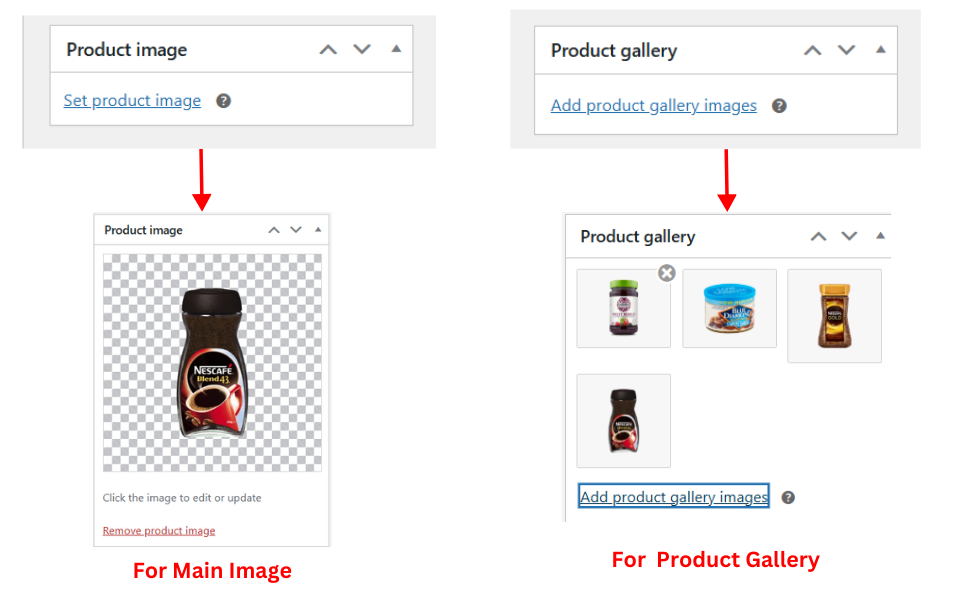
Add Product Gallery Images (Multiple Images for the Product)
The Product Gallery lets you add multiple images to showcase different views of your product.
- Scroll down to the “Product Gallery” section on the right.
- Click “Add Product Gallery Images”.
- Upload or select multiple images from the Media Library.
- Click “Add to Gallery” to save the images.
✅ Tip: Add at least 3-5 images from different angles to give customers a complete view.
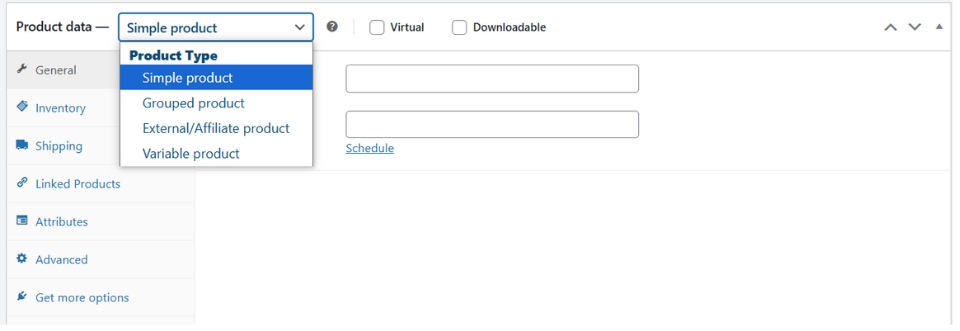
Step 4: Choose Product Type
Choose Product Type.
WooCommerce allows different types of products:
- Simple Product – Standard product with no variations (e.g., a book).
- Variable Product – Products with different variations (e.g., T-shirt with different sizes).
- Grouped Product – A collection of products sold together.
- External/Affiliate Product – Links to an external store.
🔹 For most physical products, choose “Simple Product”.
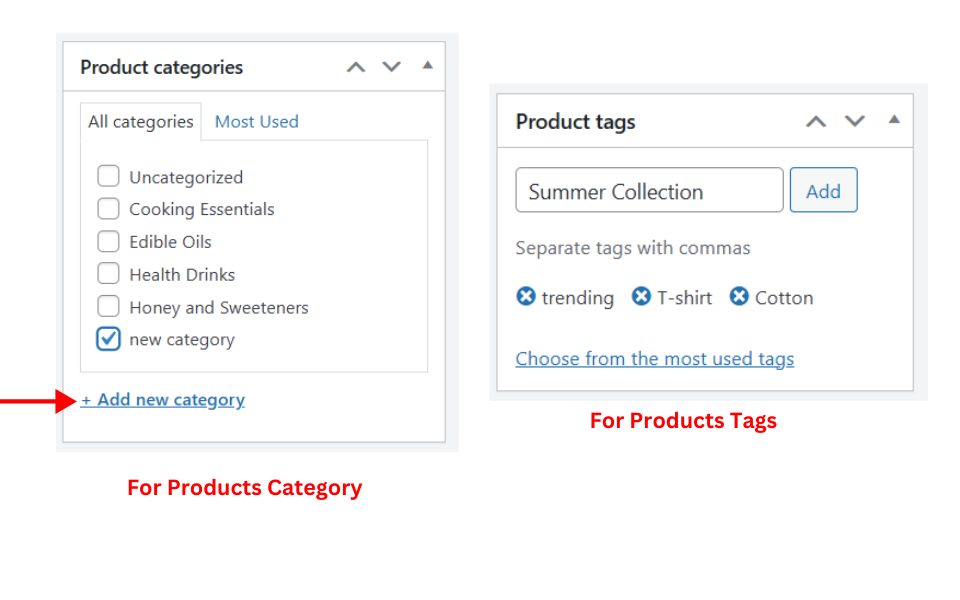
Step 5. Set Product Categories and Tags
Set Product Categories and Tags
- Assign the product to a relevant Category (e.g., “Men’s Clothing”).
- Add Product Tags (e.g., “T-shirt, Cotton, Summer Collection”) to help customers find it easily.
🔹 Using categories and tags improves SEO and store navigation.
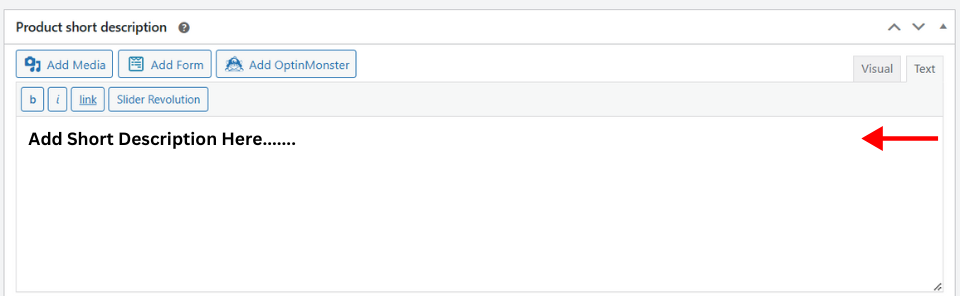
Step 6: Add Short Description (For Quick View)
Add Short Description (For Quick View)
- Add a short product description (1-2 sentences) under the Product Short Description box.
- This text appears near the product image on the store page.
Example:
“Premium quality leather wallet with RFID protection, perfect for everyday use.”
Step 7: Publish Your Product
Publish Your Product
- Review all the details.
- Click Publish to make the product live on your WooCommerce store.
- If you want to save it as a draft, click Save Draft.
🎉 Your product is now live and ready for customers! 🚀
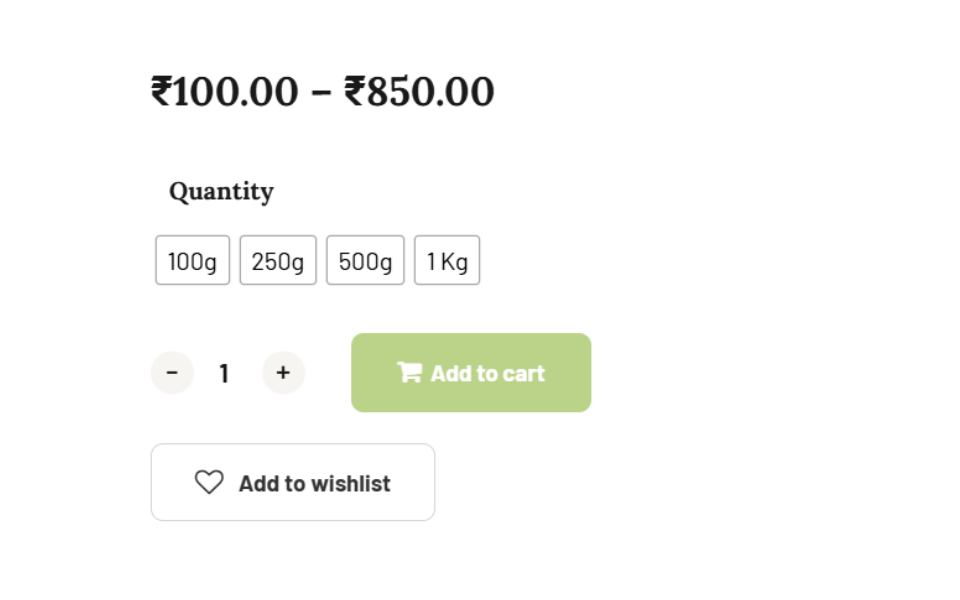
How to Add Variable Products in WooCommerce (Step-by-Step Guide)
Variable Products in WooCommerce allow you to offer different variations of a product, such as size, color, material, or any custom attribute. Instead of listing each variation separately, you can create a single product with multiple choices.
Step 1: Change Product Type to Variable Product
Step 2: Create Product Attributes (Size, Color, etc.)
Step 3. Add Variations in Product
Step 4: Add variations images and prices
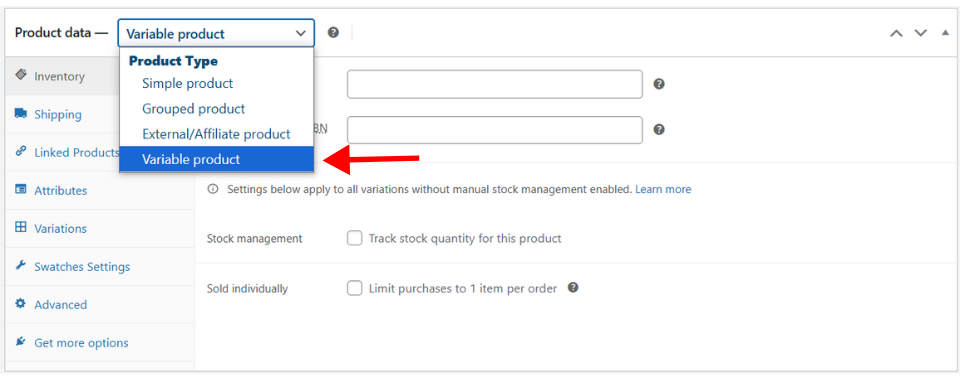
Step 1: Change Product Type to Variable Product
Change Product Type to Variable Product
- Scroll down to the Product Data section.
- Change the dropdown from “Simple product” to “Variable product”.
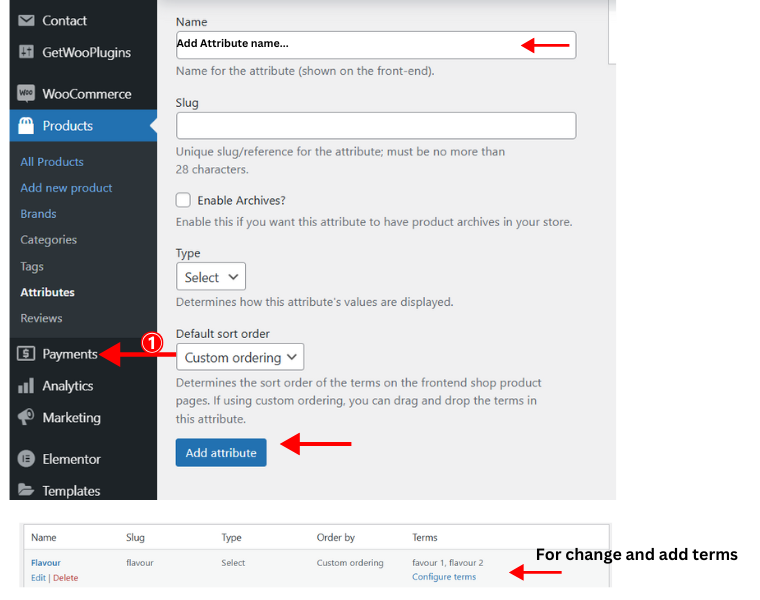
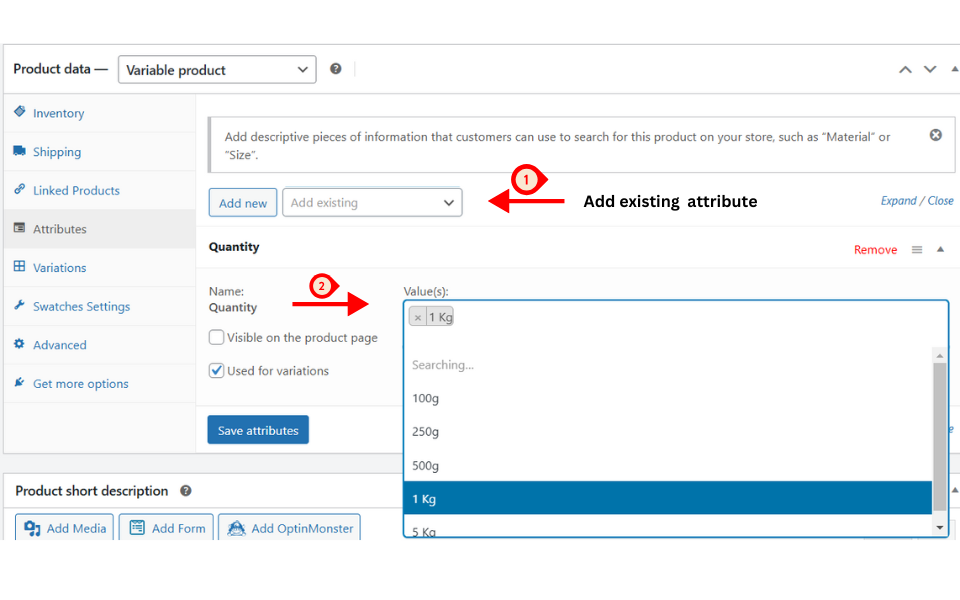
Step 2: Create Product Attributes (Size, Color, etc.)
- Go to the Attributes tab.
- Click “Add” to create a new attribute (e.g., Size or Color).
- Enter attribute values separated by a pipe (|), for example:
- Size:
Small | Medium | Large | XL - Color:
Red | Blue | Green | Black
- Size:
- Check “Used for variations” and click “Save attributes”.
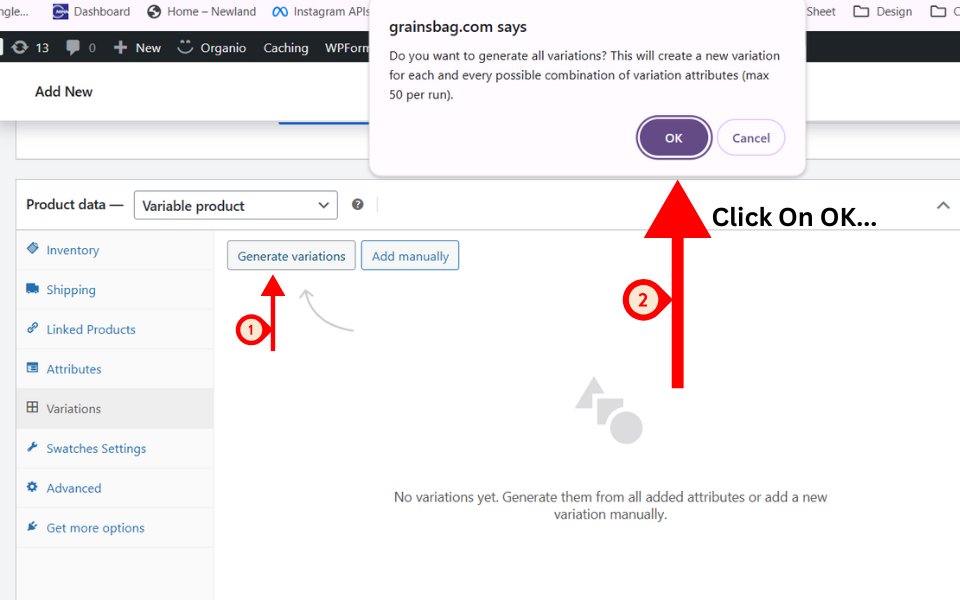
Step 3. Add Variations in Product
Add Variations.
- Navigate to the Variations tab.
- Click “Create variations from all attributes” and click “Go”.
- WooCommerce will generate all possible variations (e.g., Red-Small, Blue-Medium, etc.).
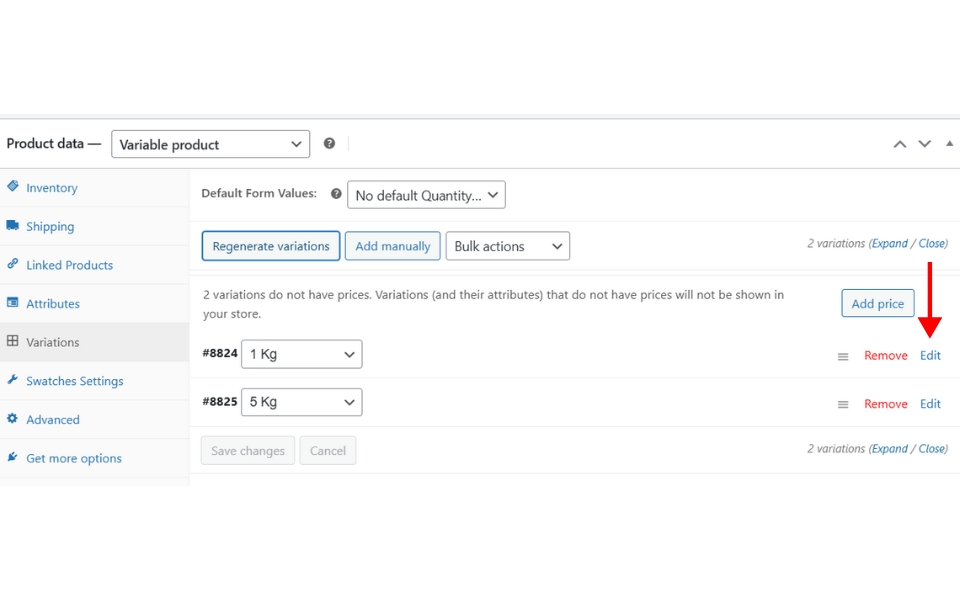
Step 4: Add variations images and prices
Set Prices, Stock, and Images for Each Variation
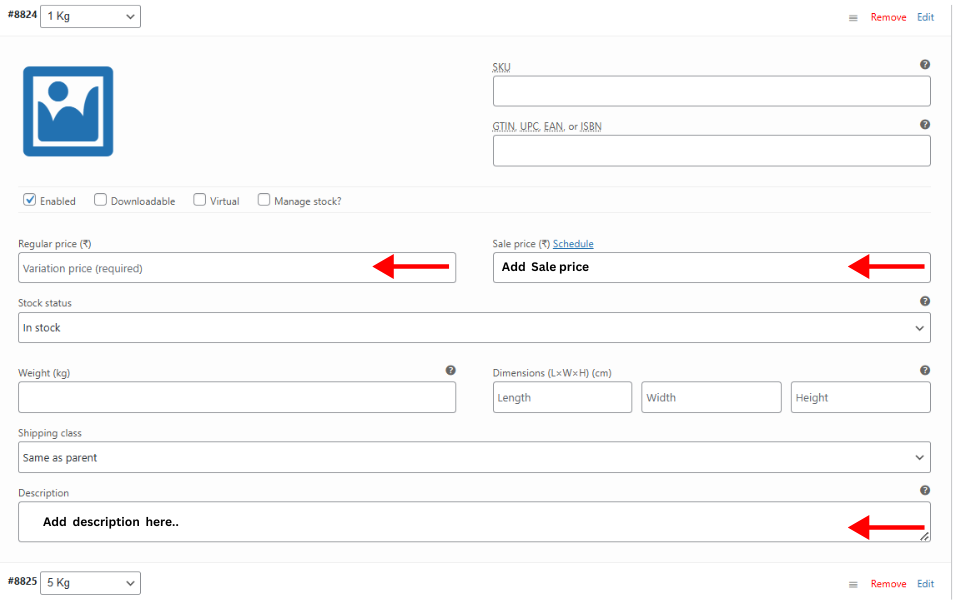
- Click each variation to expand its settings.
- Add a price (required).
- Upload a unique image for each variation (optional).
- Set stock quantity if tracking inventory.
- Click Save Changes.
Step:1.
Step:2.
Step:3.
Then click on the save button your variations has been added.

")