Website development does not have to be expensive to create. In reality, you can get started for free by using Profreehost, a reputable platform that provides free web hosting services.
We will lead you through the step-by-step process of constructing your own website with Profreehost in this detailed tutorial. Prepare to begin your website-building experience!
#1: Create an account in Profreehost
The hosting company Profreehost will assist us in creating a free WordPress website. therefore, visit to establish an account at profreehost
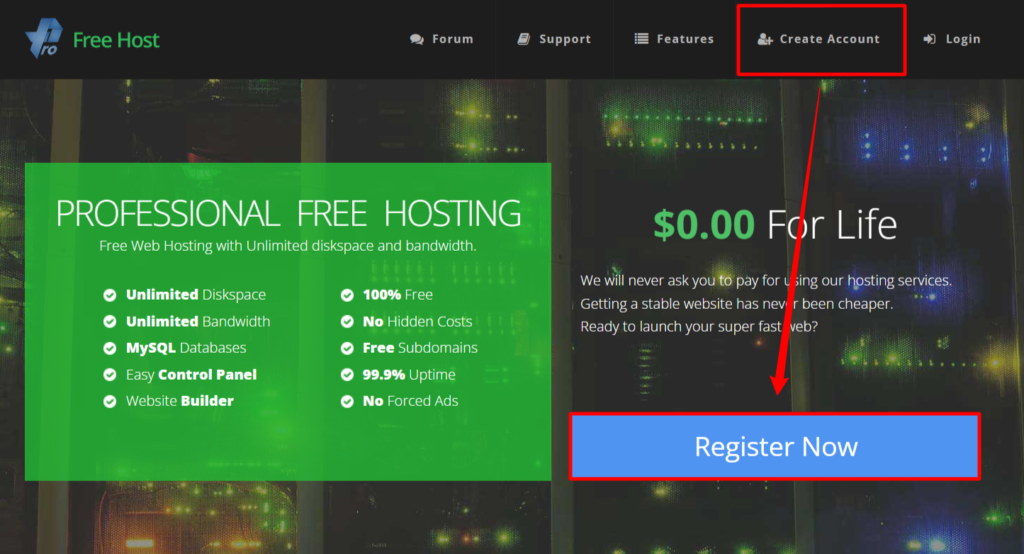
Visit profreehost.com and create an account.
Hit the “Register Now” Button on the home page.
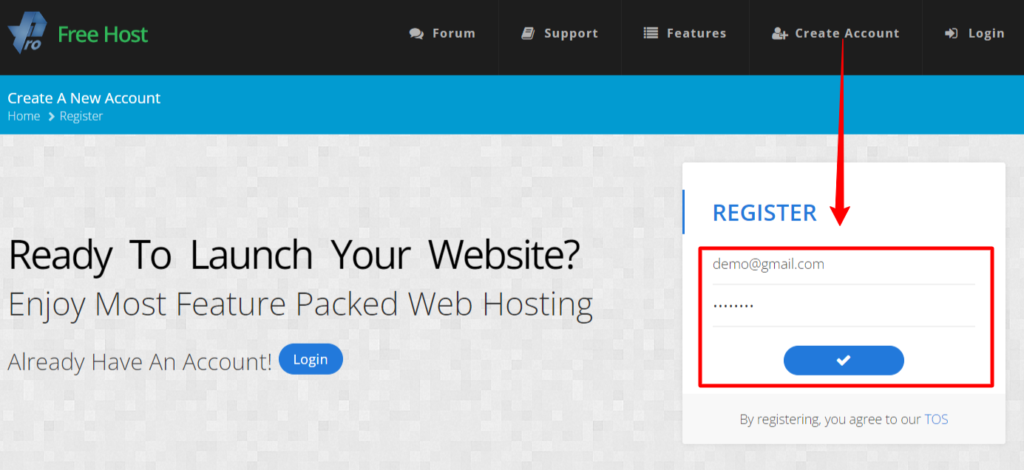
The page where you may create a new account will now be displayed to you.
If you wish to sign up for an account, enter your email address and password here. Then press the selected button.
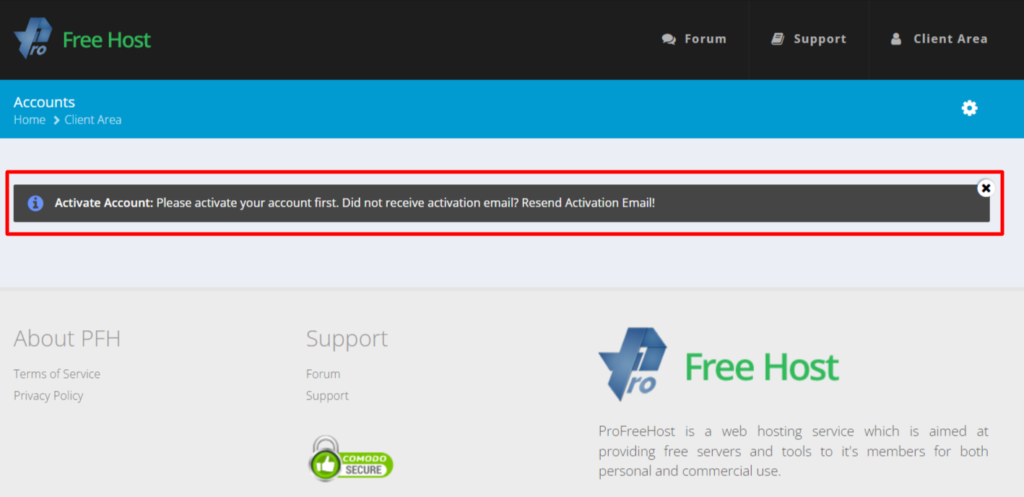
After entering your information, you should receive the message below. It indicates that you must make your account active. Your email will be provided with the link to activate your Profreehost account.
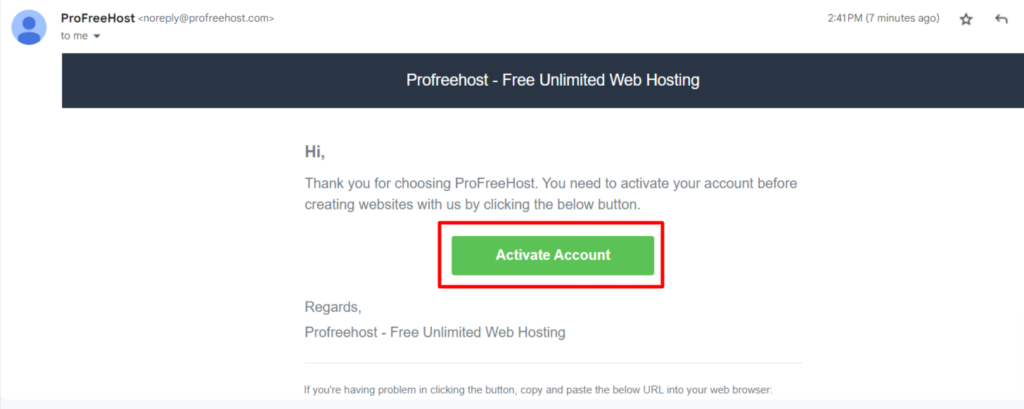
Look for communication from Free Host in your inbox that contains an activation link.
To activate your account, select the Activate Button.
You will be sent to your account on Profreehost as shown below after clicking Activate Account.

#2: Get your Free Domain
Your website is known by its domain name. When someone wants to access your website, they type this name into their browser.
In order to obtain your domain name,
‘Create New Account’ should be clicked.
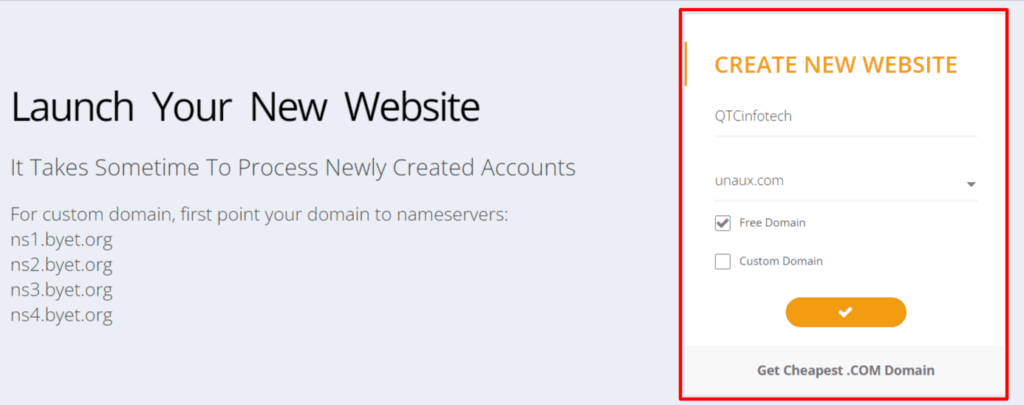
You must now choose a name for your website. We’ve decided on “QTCInfotech.”
Your website’s domain name will be this, and visitors will need it to access it.
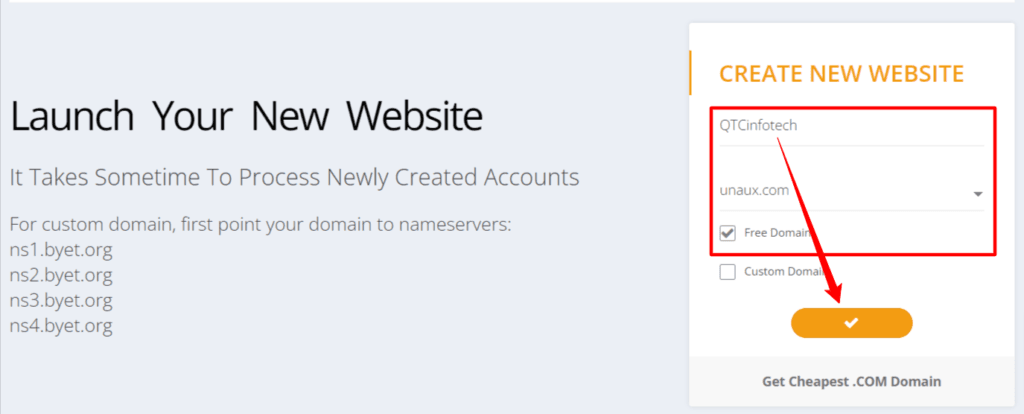
Now input the desired domain name to see if it is accessible or not.
As you can see, you may register the domain name we choose and use it to build a free WordPress website.
#3: Install WordPress on your domain
It’s time to create a free website now that we have our free domain. The platform that will enable us to create a free website is WordPress.
WordPress, but is the most widely used Content Management System (CMS) in the world, allowing you to create websites without reading any code. Therefore, right away as WordPress is installed, our website will be accessible online.
Simple Click install WordPress,
And Click the ‘Manage’ button.

After clicking manage, you’ll be sent to the page below.
After that, click “Control Panel.”

Under the program tab in the control panel
‘Softaculous Apps Installer’ should be clicked.

It will direct you to a page with a list of software options for website installation.
Choose WordPress and click “Install” here.

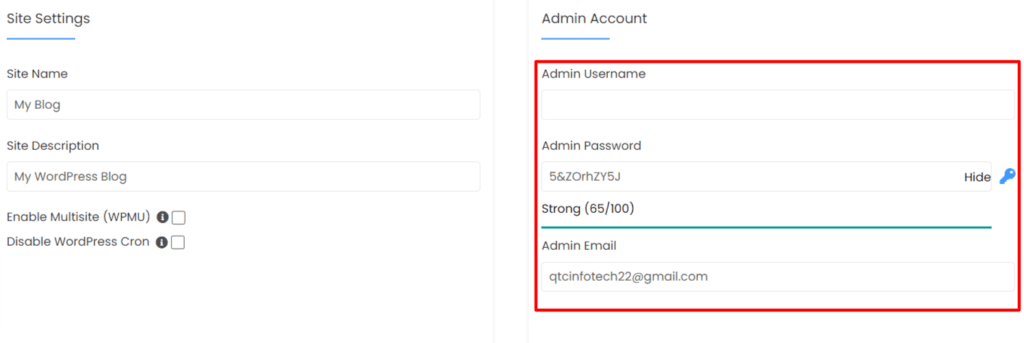
When you get to this page, select Admin Account.
A username and password for your WordPress installation must be entered here.
This will be needed later to access your website.
Click Install after you have input this information.
WordPress has been successfully installed, as you can see.
Now that your website is up on the internet, you may click on the link to it as seen in the screenshot below.
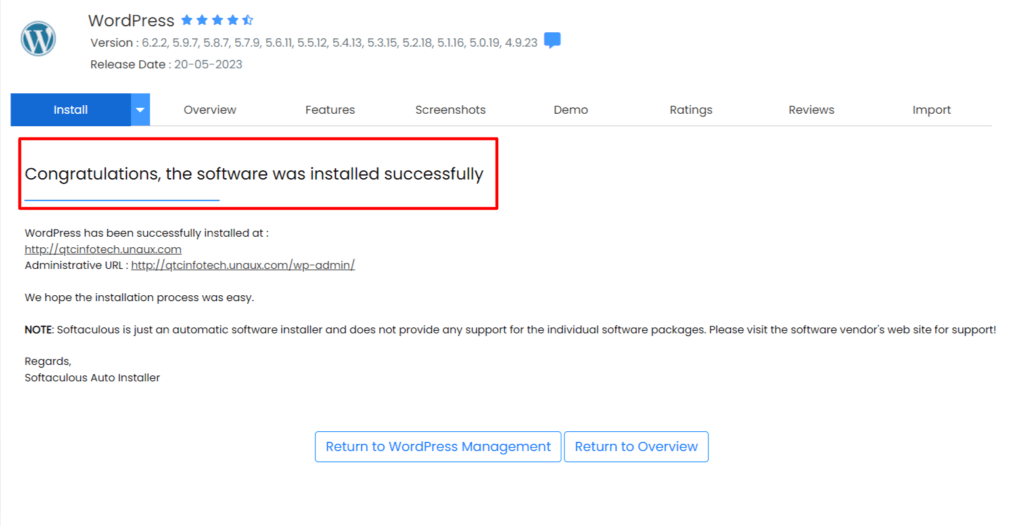
Success! Your new website is now operational.
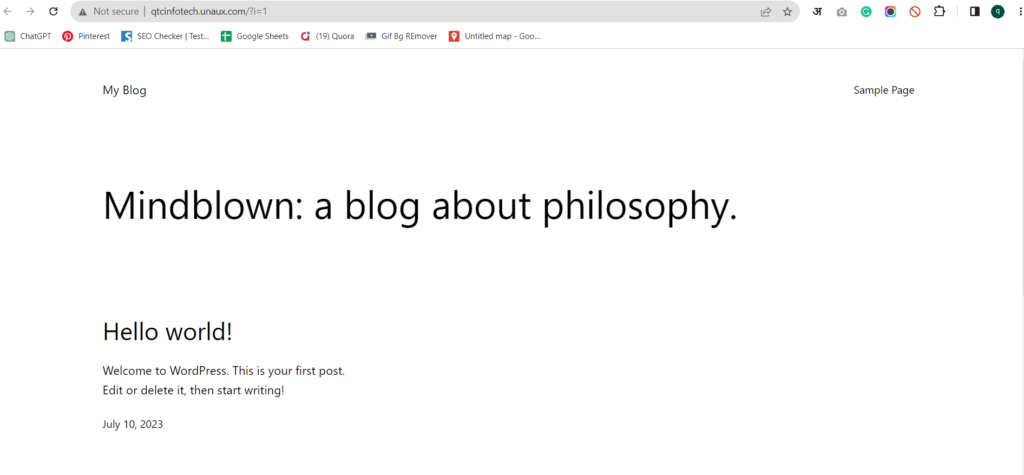
It’s time to start constructing your website now that you have successfully launched it. It’s time to create and customize the website of your dreams.
So, let’s go to the second portion of this tutorial.
Part #2: Build your dream website
Customizing the look of the website, adding pertinent sections, and adding our content are all steps in the process of building your website.
Therefore, we will do this in 4 steps.
- Register on your website.
- Pick a layout for your website.
- Edit the Website’s Content
- The Site Header was changed
Step 1: Log in to your website
Just put “/wp-admin” after the address of your site and hit enter to log in.
It will direct you to your website’s login page. ‘qtcinfotech.unaux.com/wp-admin’, for instance.
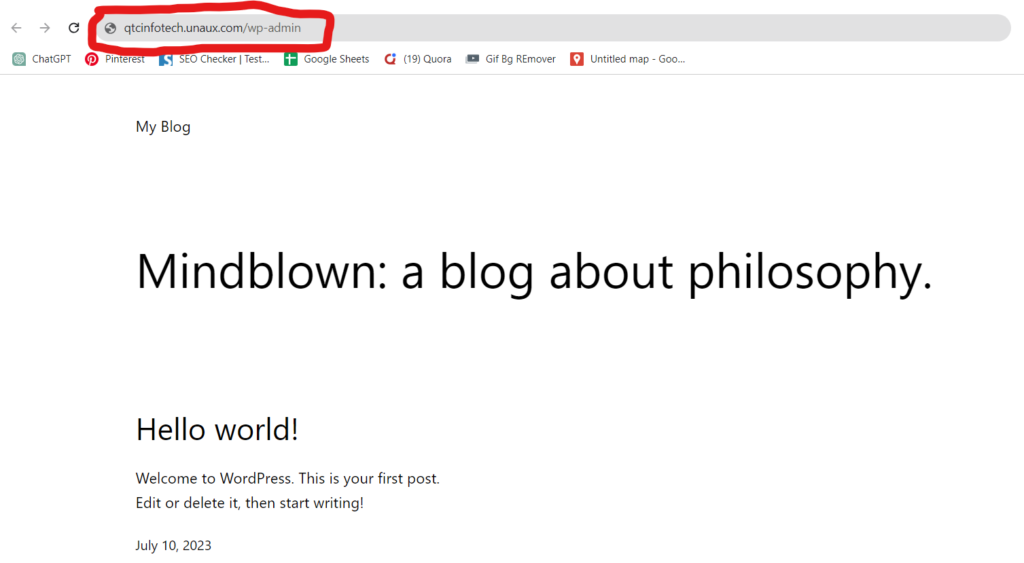
It will direct you to your website’s login page.
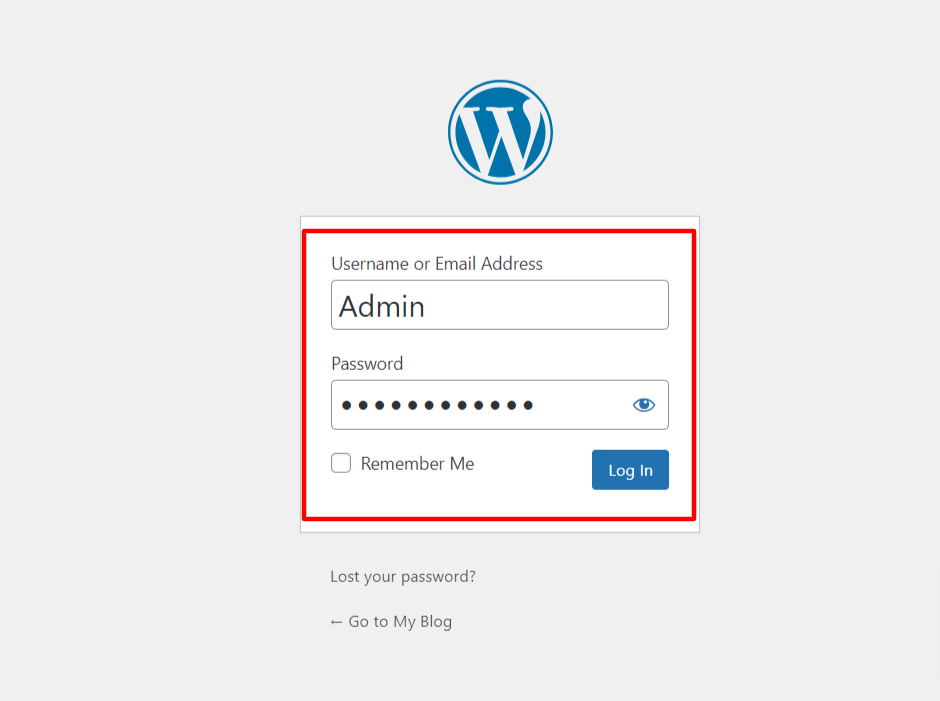
Now log in using the WordPress login information you created. then select Login.
Once there, you may manage every aspect of your website using the WordPress Dashboard.
We may go on to the next step when you log in.
Step 2: Choose a design for your website
Instead of starting from scratch, you’re going to pick a design and then make changes to it to create the website of your dreams. Installing the Astra theme in WordPress is necessary before choosing your website’s design.
So click “Themes” under “Appearance” to install the theme.
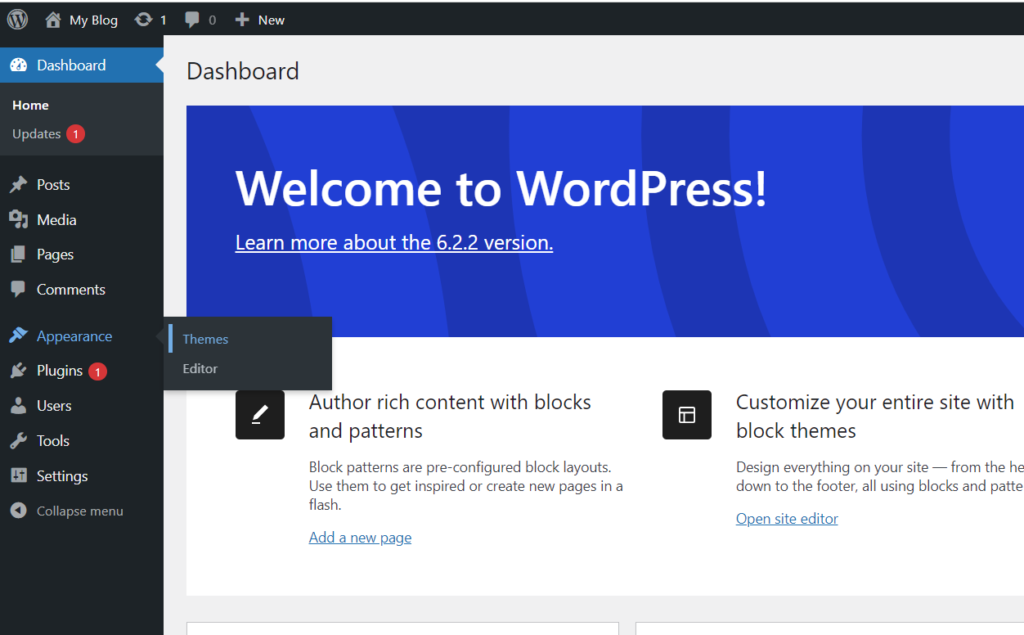
Click Add New Theme in the Themes area to add a theme.
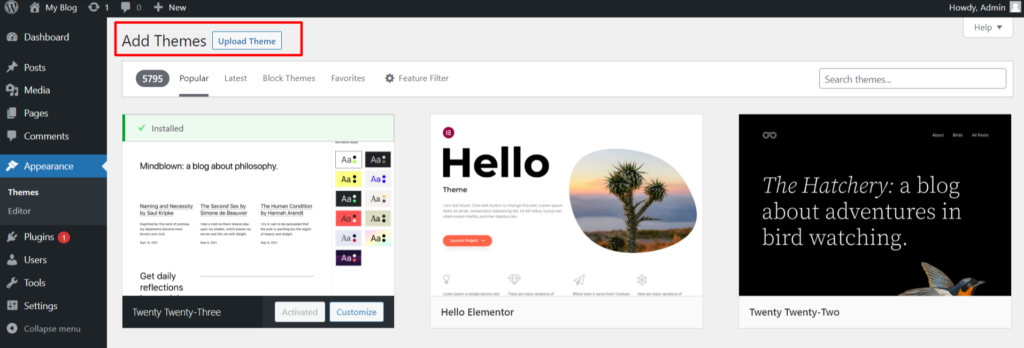
You will be moved to a theme library. Look for a theme here.
Now select any theme and click Install.
Once you install this template, you will be able to select a wide range of website designs.
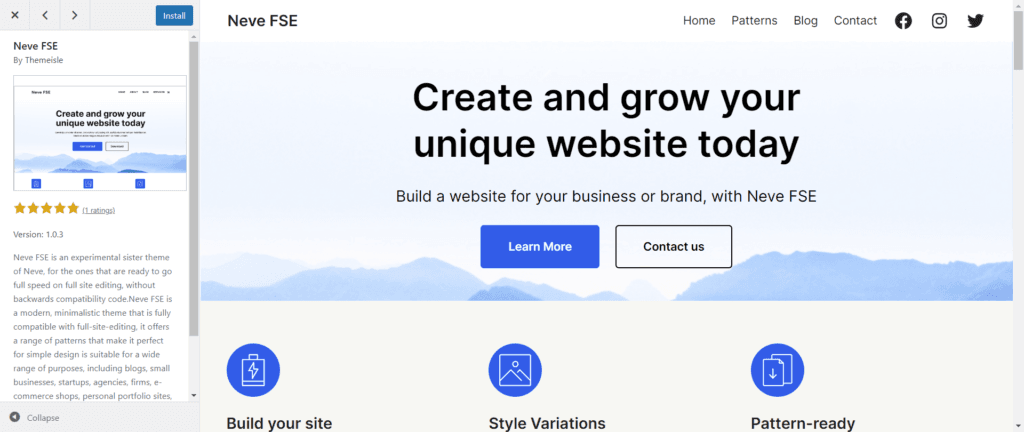
When the installation is finished, click Activate to begin using the theme.
Conclusion
In summary, establishing a free website with ProFreeHost is a quick and easy approach to creating your online presence. ProFreeHost enables individuals and small businesses to bring their ideas to life on the web without the weight of expensive hosting fees thanks to their user-friendly interface, large selection of themes, and dependable hosting services.
You may release your creativity, present your work, and connect with a worldwide audience by following the step-by-step approach offered in this blog. So, why delay? Begin your online journey with ProFreeHost today and watch your website thrive in the digital landscape. Remember, the possibilities are endless if you have dedication and enthusiasm. Happy website creation!


